Are you using Facebook Pixel correctly?
All the work that you have been researching to assemble your new Facebook Ads campaign will be in vain if you are not tracking the results and optimizing the campaign.
If you do not install the code correctly, you are navigating aimlessly, you will not know if your campaign is giving the desired results and you will not have a way to measure the ROI even in its last cent.
The tracking of campaigns on Facebook is through Facebook Pixel, a small code that must be installed on your website.
Step 1: Where to Find The Facebook Pixel
In this article, you will learn how to configure this pixel from your ad manager, how to install it on your website and how to start creating specific audiences.
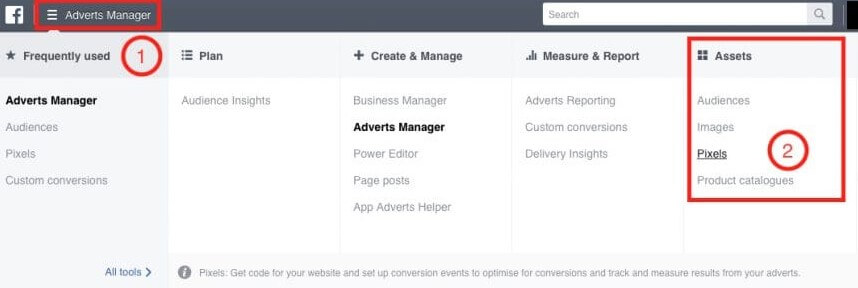
The pixel is inside the ad manager under the “Pixels” tab.
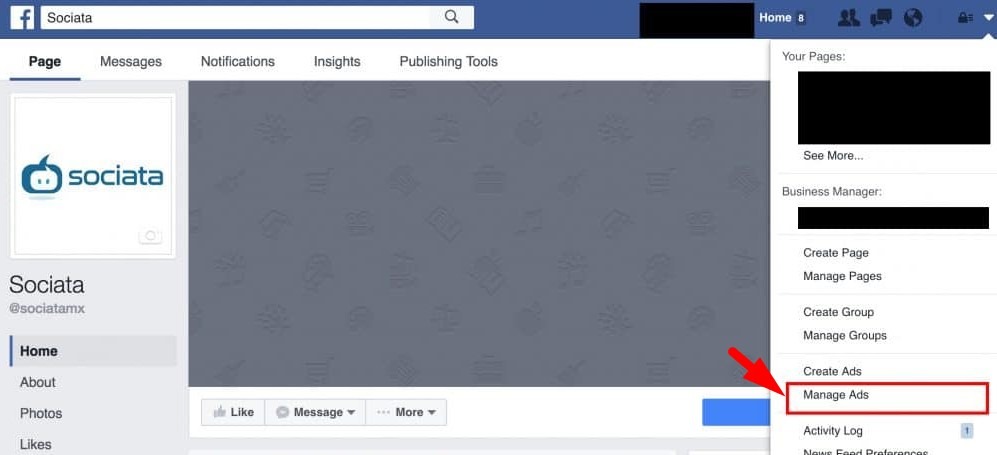
Go to your ad manager
Then click on the upper left, below “Assets” and select “Pixels”
Here will be 1 of 2 screens
If you have not created any pixel you will see the following:
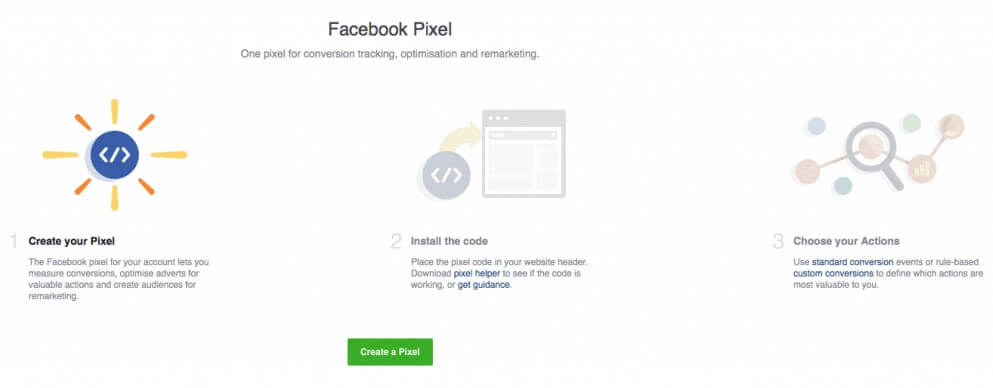
Follow the instructions until the confirmation window that your pixel has been created appears.
If you have created the pixel but you have not installed it, you will not have any information so you will see an empty graphic with a message saying “There is no activation in the Pixel”
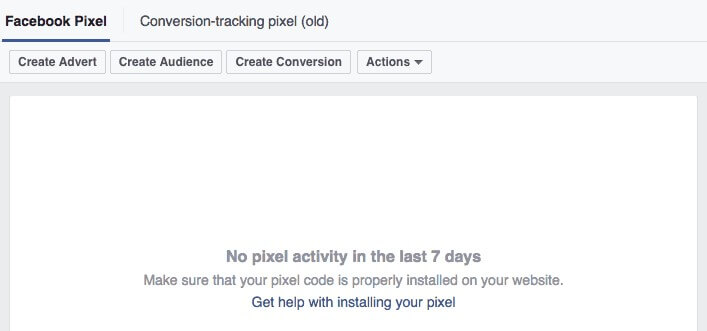
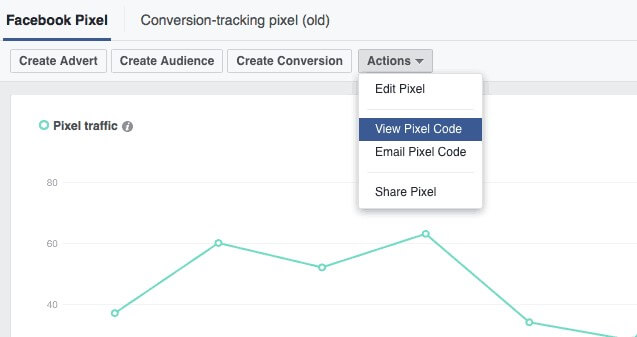
To see your code click on the actions button and scroll down to Ver Pixel Code
A pop-up will appear with your code
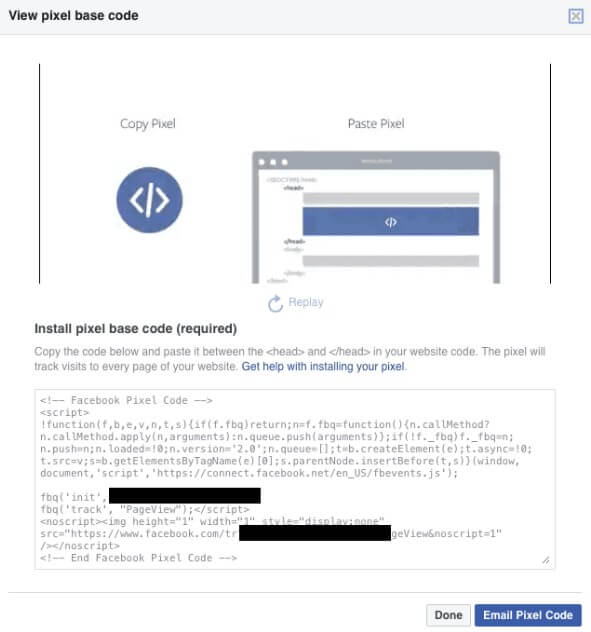
This is known as the base code and you will have to install it in each of the pages of your site.
For sites that handle wordpress, there is an incredible free plugin PixelYourSite that allows you to have a facebook pixel wordpress across the entire site with a single click.
Step 2: Installation of the Facebook Pixel WordPress
Go to the plugins menu within the WordPress administrator and search for PixelYourSite.

Click on install
Activate the pixel.

Once the plugin is installed and activated, go to the PixelYourSite dashboard.
You will need to enter your Pixel ID, return to the “Pixels” tab in the ad manager, it is located in the upper right corner below the name of your pixel.
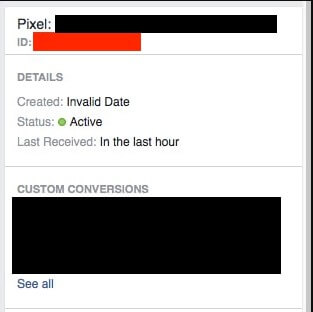
Paste the ID of your pixel and paste it in the field where the PixelYourSite plugin asks for it.

Go to the bottom and click on save.
Congratulations! , you have installed the Facebook pixel on your site. Now when someone visits your page from any source, be it search, social networks, emails, etc. will be marked by the pixel, and found on Facebook, in this way you can start creating unique audiences of people who have ever visited your site.
Step 3: How to Know If Your Pixel is Working
To check if the pixel is working, go to your site and load a page, then return to the “pixels” tab within your ad manager and in the right column there should be a notice that says “Active”
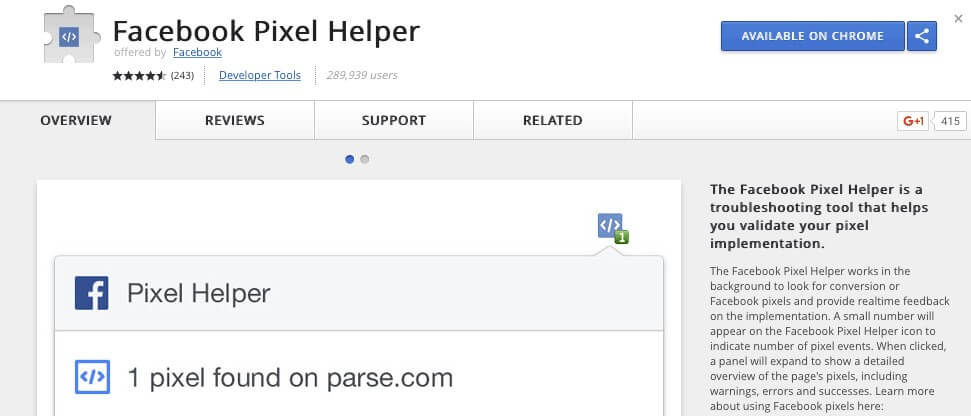
You can also use the Facebook Pixel Helper, an extension for Google Chrome.
Step 4: How to Create Your Unique Audience Through the Ad Manager. Facebook Pixel Ads
Now that you’ve created your pixel and installed, it’s time to get the most out of it and create a unique audience for the people who have been visiting your website.
Facebook Pixel Ads allows you to create even retargeting in specific URLs or that have had a conversion configured.
Go to the ad manager and select “Pixels.” In the next window, click on “Create Audience”
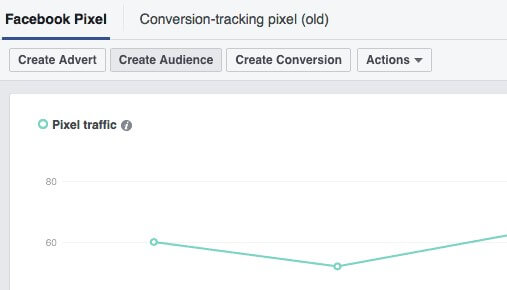
A pop up will appear, something very similar to this:
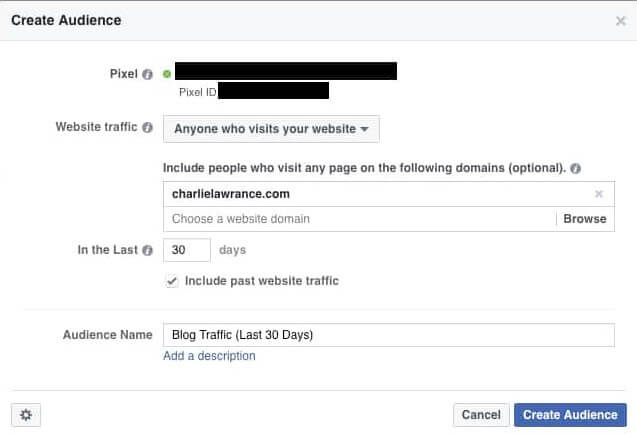
For now we will create the most basic way of this type of audience, os all the people who have visited the site.
Web traffic – Keep it as “Everyone who visits your website”
Domain– You may not see this option if you have a pixel installed in only one domain
In the last – You can change the range of information from 30 to 180 days, however note that if you are running a retargeting campaign while the number of days a person has visited your site, your CTR will be lower.
Audience name – Give your audience a name that you can easily identify with.
Click “Create Audience”
Immediately you will see a message that will confirm that your audience has been created. To see the new audience go to the “Audiences” tab in the same way you navigated to the “Pixels” tab

Conclusion
To recap:
Step 1 is to create your Facebook pixel within the ad manager by navigating to the “Pixels” section
Step 2 is to install it to your website, if you are using WordPress you can do it with the extension of Facebook Pixel WordPress, the PixelYourSite plugin and your ID
Step 3 is to test if the pixel is active, to do this you can load a page inside your site and return to the “Pixels” tab to check the status of the pixel or you can use the Facebook Pixel Helper extension of Chrome.
Step 4 is to create your unique audience of all your visitors from an X number of days and start using the Facebook pixel ads

 My Account

 USD $
USD $  BDT ৳
BDT ৳