 My Account
Are you looking to add WordPress Comment Captcha to your WordPress comment form?
Spam comments have gotten out of control for WordPress websites. As spammers become more sophisticated, they can launch massive spam attacks with little effort.
Akismet, the popular spam filtering service for WordPress, blocks approximately 7.5 million spam comments every hour. Dealing with spam comments can be frustrating, and some bloggers even choose to completely disable comments on their websites.
Instead of disabling comments, you can add Google reCAPTCHA to the comment form to virtually eliminate spam.
In this tutorial, we will show you how to easily add WordPress Comment Captcha to the comment form on your WordPress website.
What is Google reCAPTCHA?
reCAPTCHA is an advanced form of CAPTCHA, which is a technology used to differentiate between robots and human users. CAPTCHA is an acronym for “Fully automated public Turing test to inform computers and humans apart.”
Google acquired the CAPTCHA technology in 2009 and then renamed it as reCAPTCHA. They also made it easier for human users to pass the test easily.
Basically, it presents users with a simple checkbox in which they can click to pass the test. If, for some reason, the test is not validated, the user will be presented with a challenge that identifies the text of an image or matching objects in several images
Google has made reCAPTCHA publicly available, so that website owners can use it in contact forms, sign-in pages, and comment forms to reduce spam.
Here is an example of what the reCPATCHA test looks like for most of its users:

It is very easy to configure and add to the WordPress comment form.
That said, let’s see how to easily add reCAPTCHA to the WordPress comment form with step-by-step instructions.
Step 1: Start – Add WordPress Comment Captcha
The first thing you should do is install and activate the reCAPTCHA in the form of WP comments plugin. You can see our step-by-step guide on how to install a WordPress plugin for detailed instructions.
After activation, you must visit Settings »reCAPTCHA in Comments page to configure the plugin settings.
Step 2: Register your website to get the keys of the reCAPTCHA API
The add-on needs 2 Google API keys to add a reCAPTCHA checkbox to its comment form.
To obtain the API keys, go to the Google reCAPTCHA website and click on the ‘Admin Console’ button located in the upper right corner of the screen.

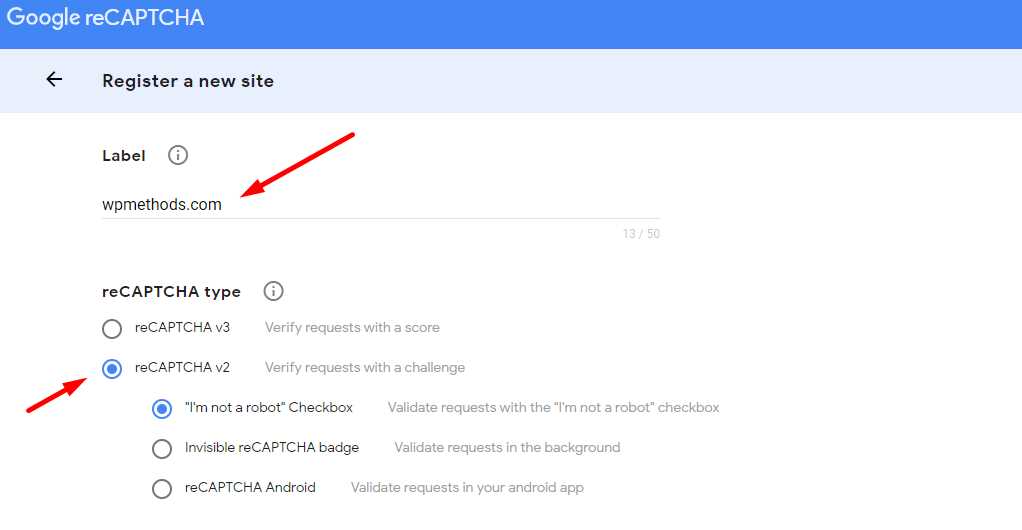
You will be asked to sign in with your Google account. After that, you will see the “Register a new site” page where you need to provide basic information to register your site.
First, you must enter the name of your website or any name you choose in the Label field. This will help you easily identify your site in the future.
Next, you must select the reCAPTCHA V2 radio button.
This will open 3 new options. Since you want to add the reCAPTCHA check box to your site, you must select the “I am not a robot checkbox” option.
The Domains text box allows you to add the domain name of your website where you would like to add the reCAPTCHA checkbox.
You can also add multiple domains or subdomains by clicking on the plus sign (+) icon. This will allow you to use the same API keys in different websites.

Under the owners, Google will already add your email address. You can also add another email if you wish.
You must then accept the terms of service to use Google reCAPTCHA on your site.
Also, select the Send alerts to owners check box to let Google send you emails if they detect any incorrect settings or suspicious activity.
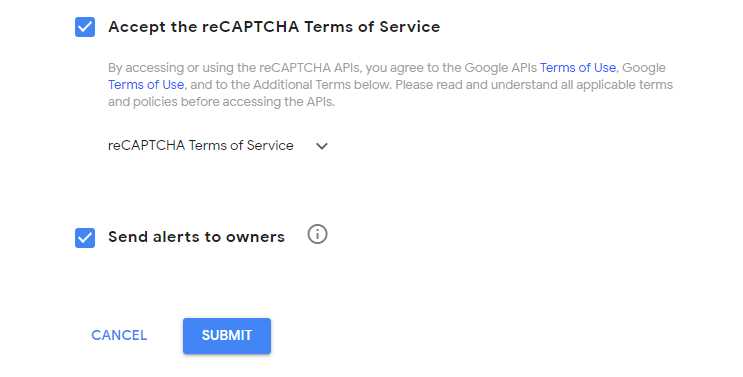
Once you have filled out the form, you can click Submit Button to register your site.
Google reCAPTCHA will now show you a success message along with the site key and the secret key on this page.

Now you can use these API Keys in the plugin settings on your website.
Step 3: Add reCAPTCHA to the WordPress comment form
Go to Settings »reCAPTCHA in Comments from the left sidebar of your administration panel.
On the configuration page, you must scroll down to paste the site key and the secret key
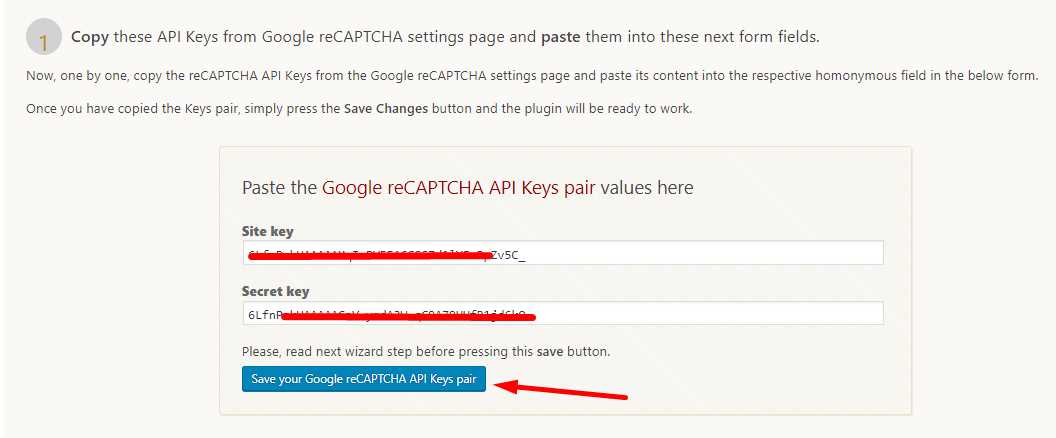
Once you have finished, click on the “Save your Google reCAPTCHA API Keys pair” button to store the API keys.
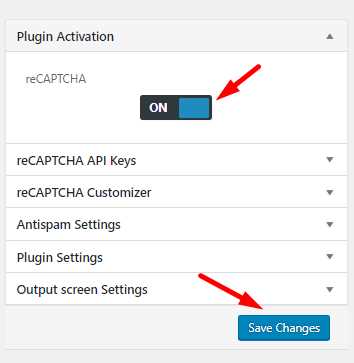
The last thing you should do is enable reCAPTCHA by clicking the toggle button and then clicking Save Changes.
You can also do the basic customization by clicking on the customizer reCAPTCHA option.
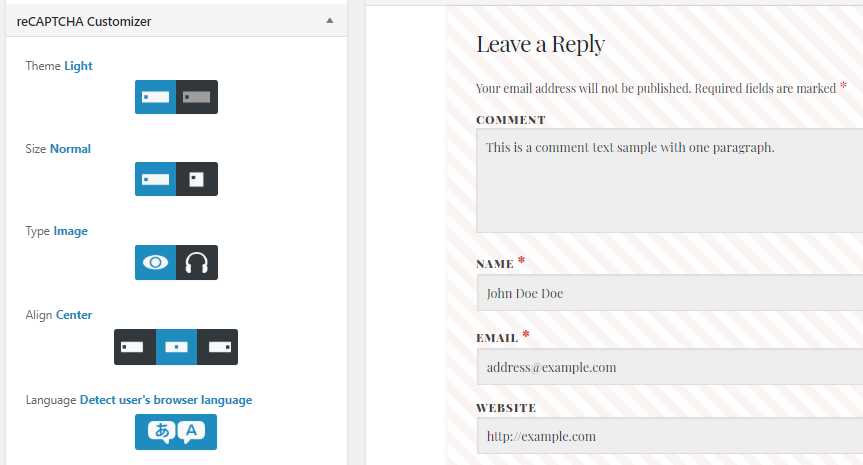
Here you can make changes to the style, size, and alignment of the reCAPTCHA checkbox.
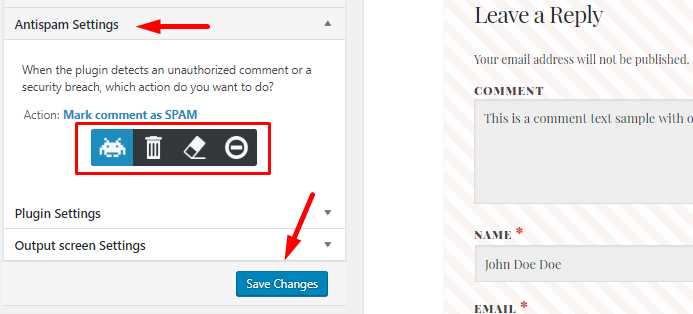
The plugin also has Antispam Settings Option that allows you to decide what to do when the add-on detects an unauthorized comment or a security breach.
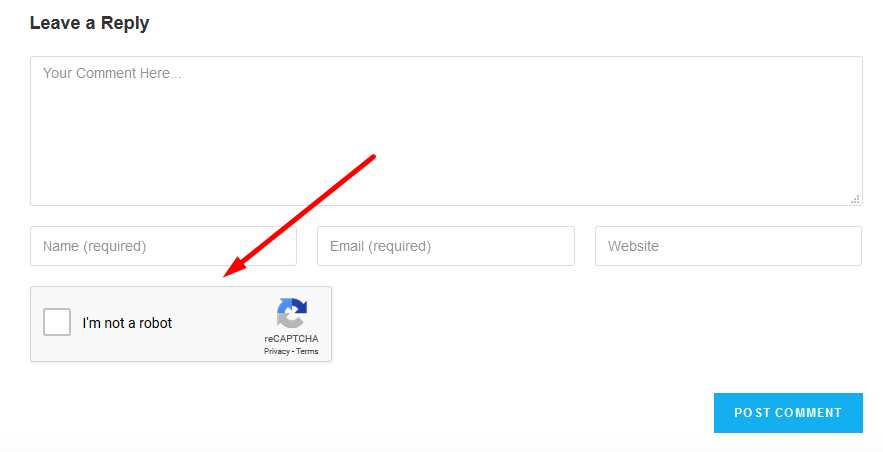
Congratulations, you added WordPress Comment Captcha to your WordPress comment form. Now you can check the comments section of your blog posts to confirm that it works correctly.
Note: The reCAPTCHA checkbox will be displayed only for users who have closed the session, so you will need to log out or open your website in an incognito window of your browser to preview Google reCAPTCHA.
We hope this tutorial has helped you learn how to add reCAPTCHA to the WordPress comment form on your website.
You can also read our article Best WordPress Social Media Sharing Plugins to add social icons on your WordPress website.


