 My Account
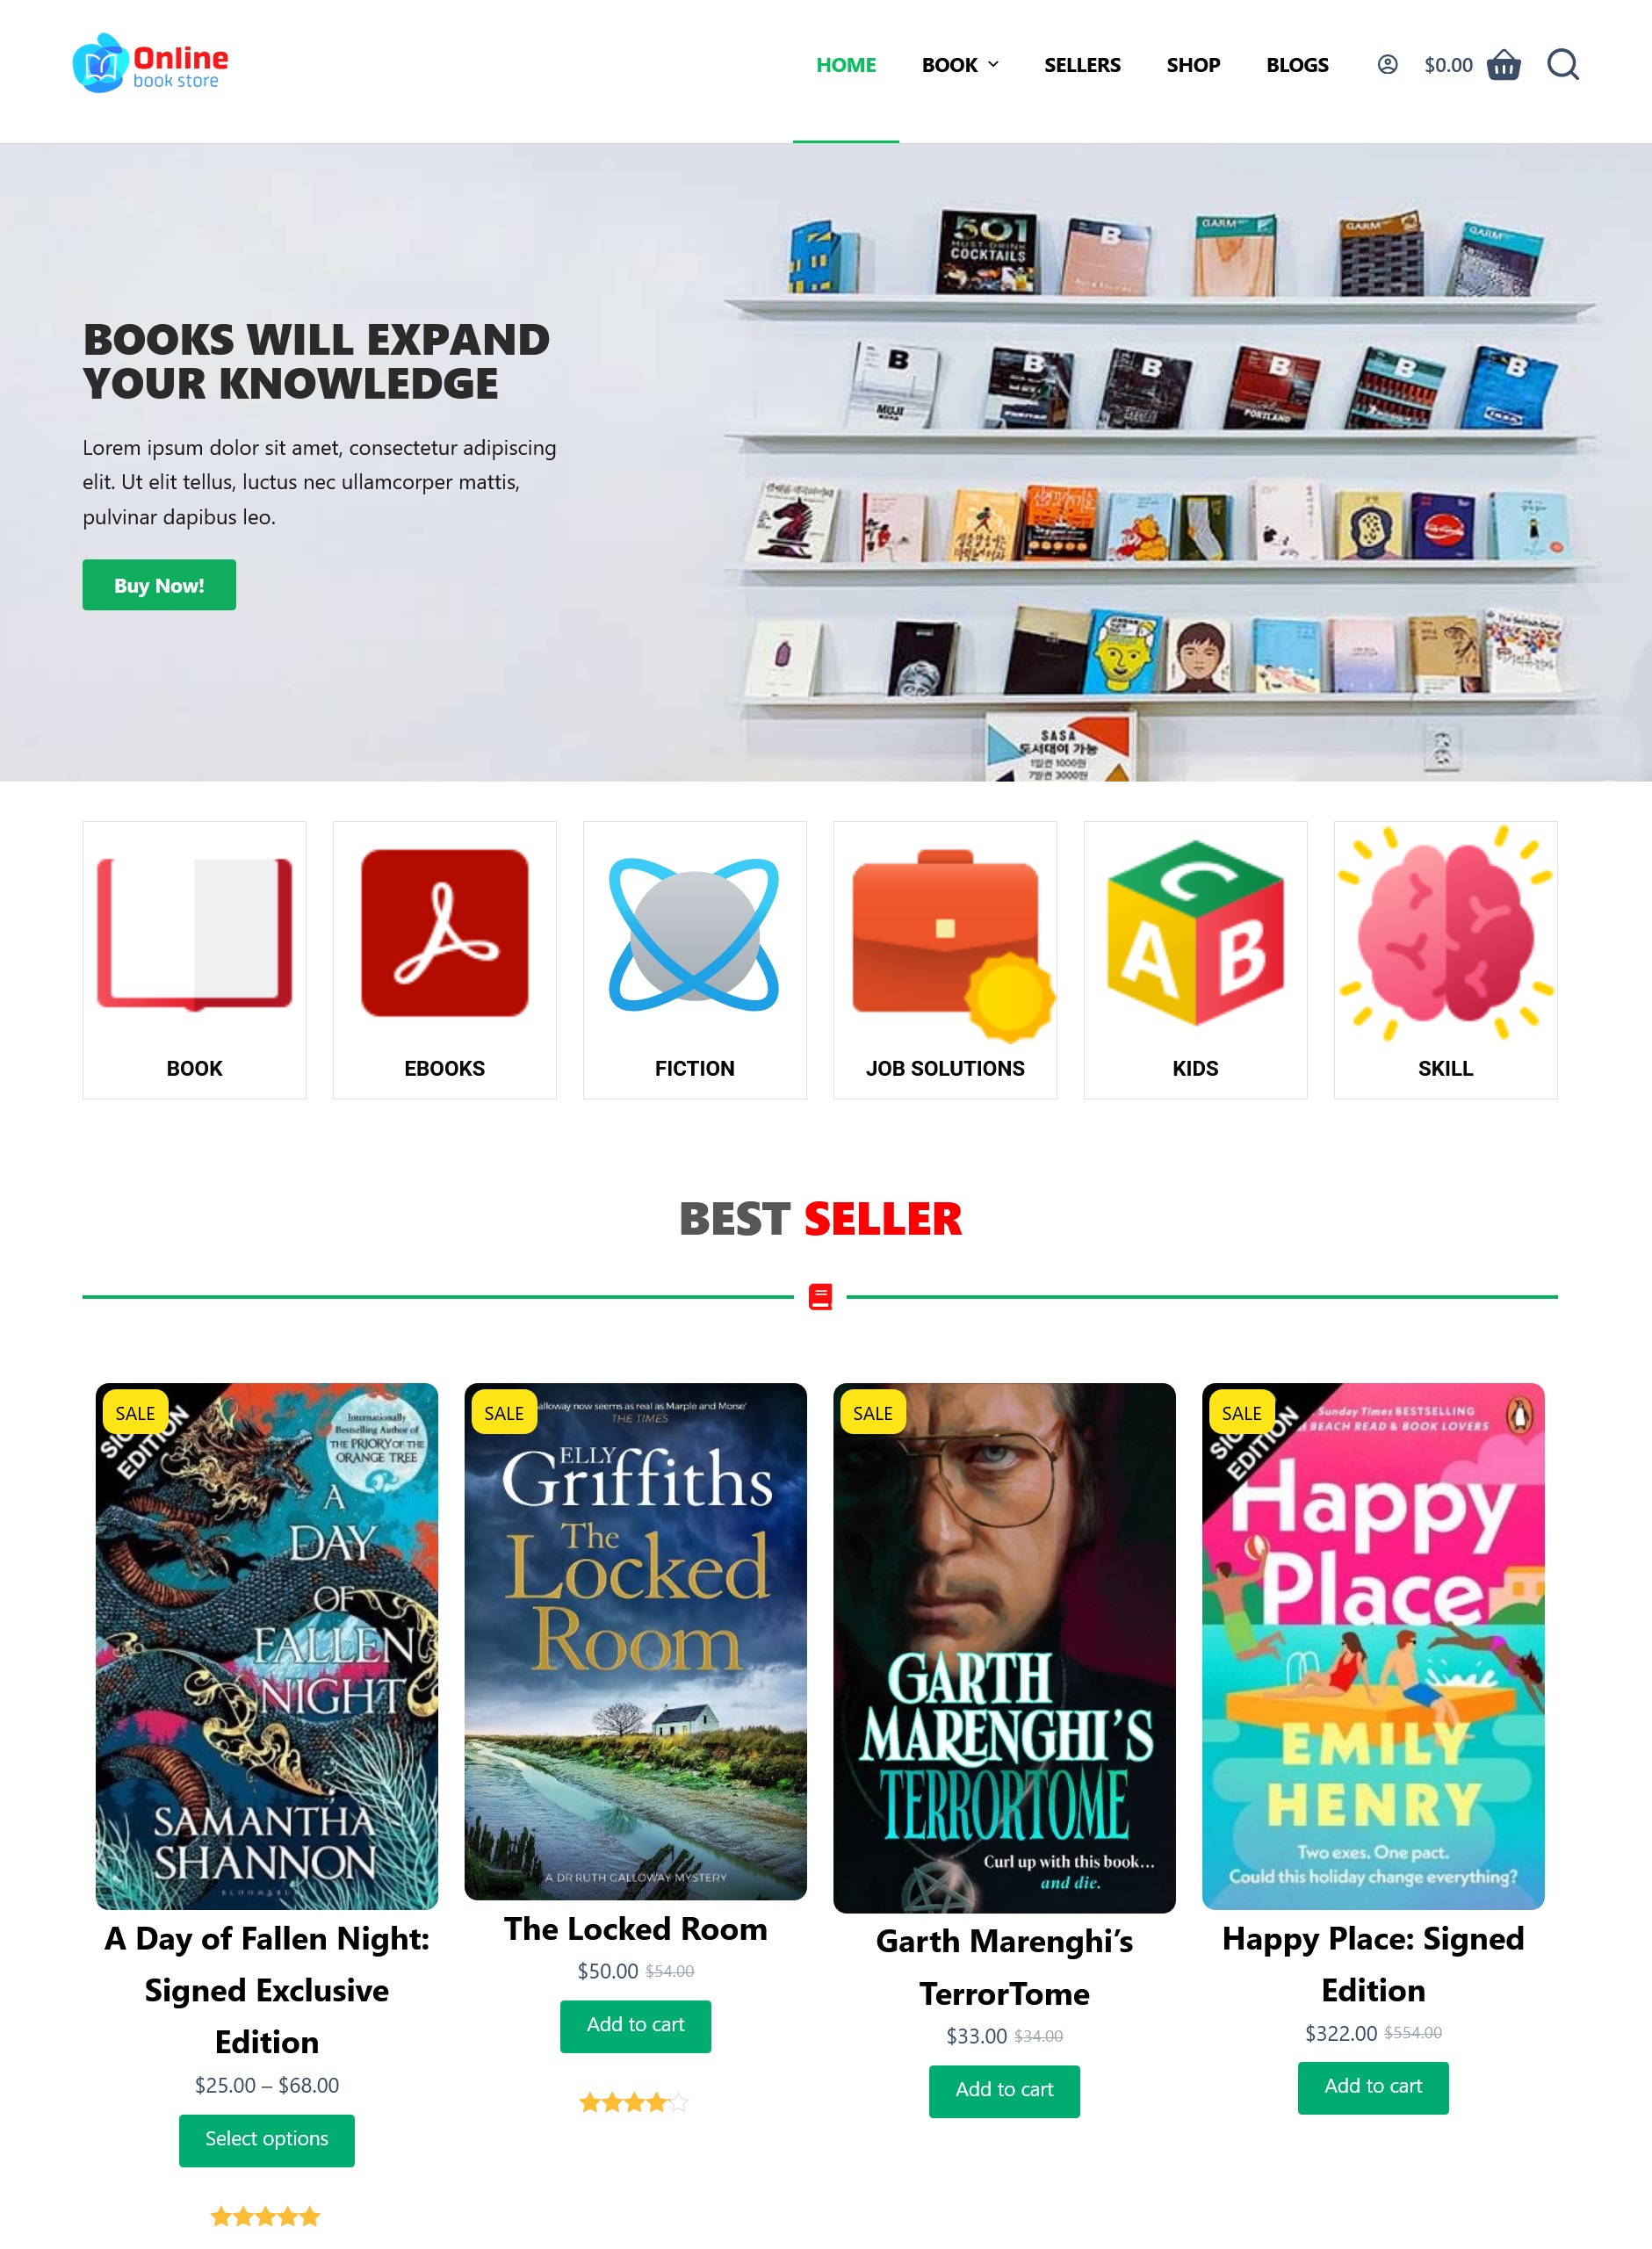
Following this article, you can easily create a multivendor book store WordPress website using free resources. We will use free WordPress themes, plugins, and codes to make this website. Just you have to follow these steps.
Video Tutorial
1. BUY DOMAIN & WEB HOSTING
First of all, we need to buy domain & web hosting to host our website and get our site URL.

Some Best Web Hosting Providers
You can buy Domain and Web hosting from any provider, but I shared some providers which give you to best service and customer support. Just follow these links and you will get up to 60% discount.
2. WordPress theme and some plugins to Design & Add Functionalities
You can use this theme to design your website like that. And you can download all images, demo data, and Elementor JSON files to design your homepage. Before Importing the Elementor file, you have to install all plugins below.
- Blocksy WordPress Theme Download (Free Version)
- WooCommerce Plugin Free Version To add Ecommerce Functionalities.
- WCFM Marketplace Free Version to add Multivendor Marketplace Functionalities.
- Elementor Free Page Builder To Design Website.
- JetWidgets Free Plugin to Design Product Categories, and design WooCommerce Product Grid with Elementor.
- Demo Images, Homepage Elementor Template Download
You can add some other features to improve design and get best users performance.
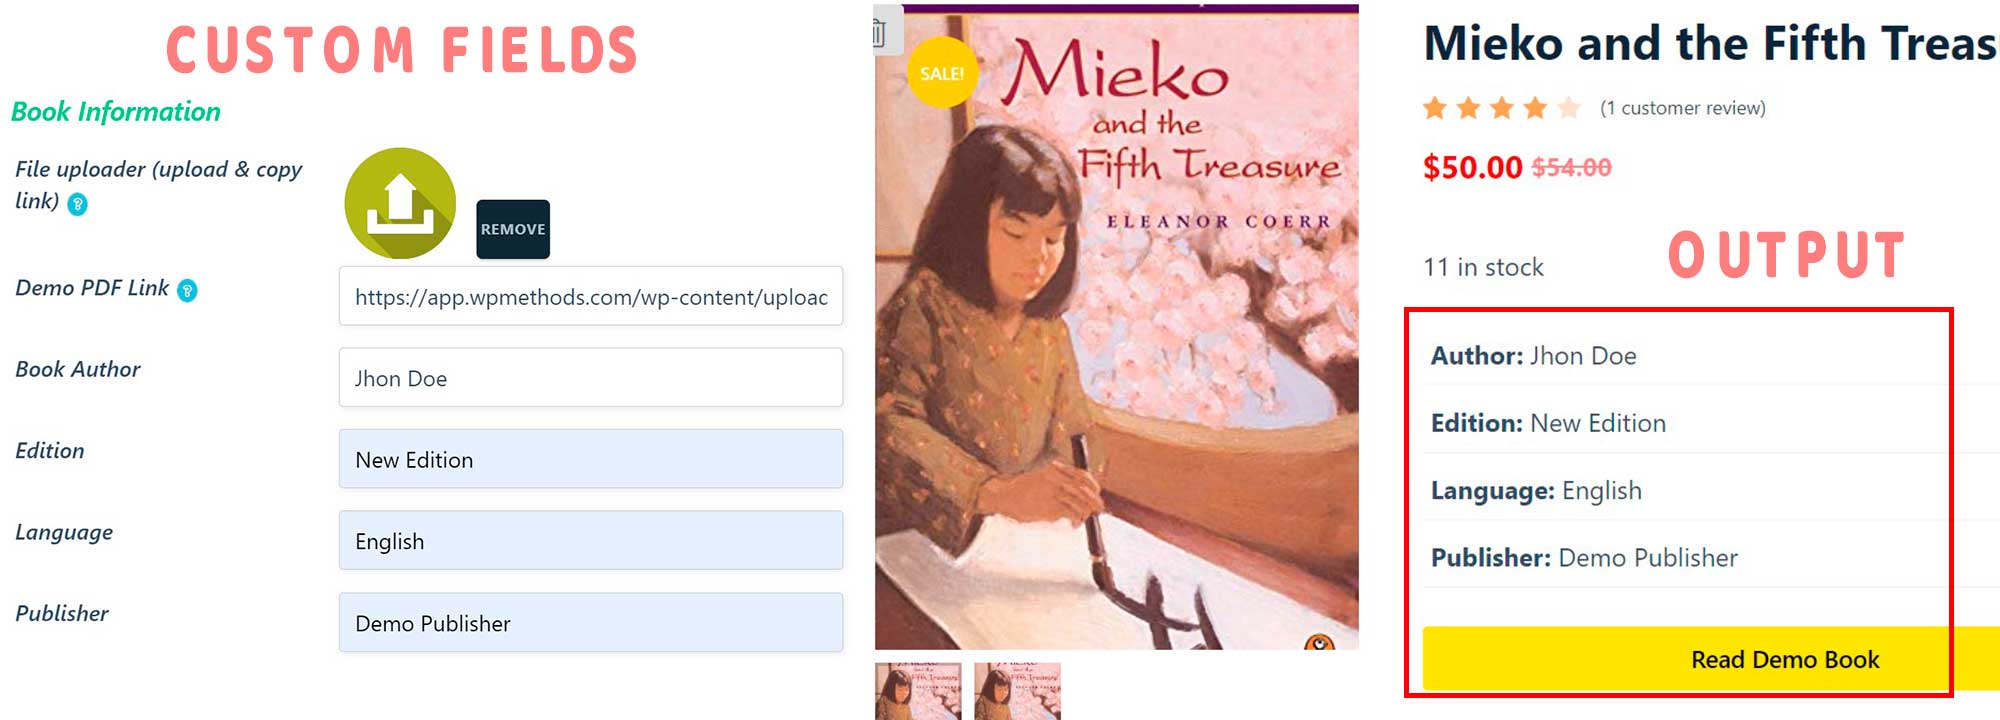
☞ Read Demo Book & Book Information: By adding these features, your customers can read this book before ordering. And add some custom fields to show Book Information on the single product page. Just you have to add some codes and WordPress plugins. And you can add any custom field with ACF for WCFM Marketplace plugin and show these fields on the single product page. Your vendors or sellers can add custom product information using custom fields.
We need to install some plugins to add this feature.
- ACF) Advanced Custom Field plugin to create custom fields.
- PDF Embedder Plugin to embed demo pdf file from pdf URL custom field.
- Simple Custom CSS and JS Plugin to add custom CSS & Javascript code on WordPress website.
- Code Snippets to Add PHP Code.
Creating Custom Fields with ACF
After installing ACF plugin then you have to create some fields. Just go to WordPress dashboard> custom fields> create a field group and create some fields whatever you want. For the “Read Demo Book” field you can select URL type and collect filed names.
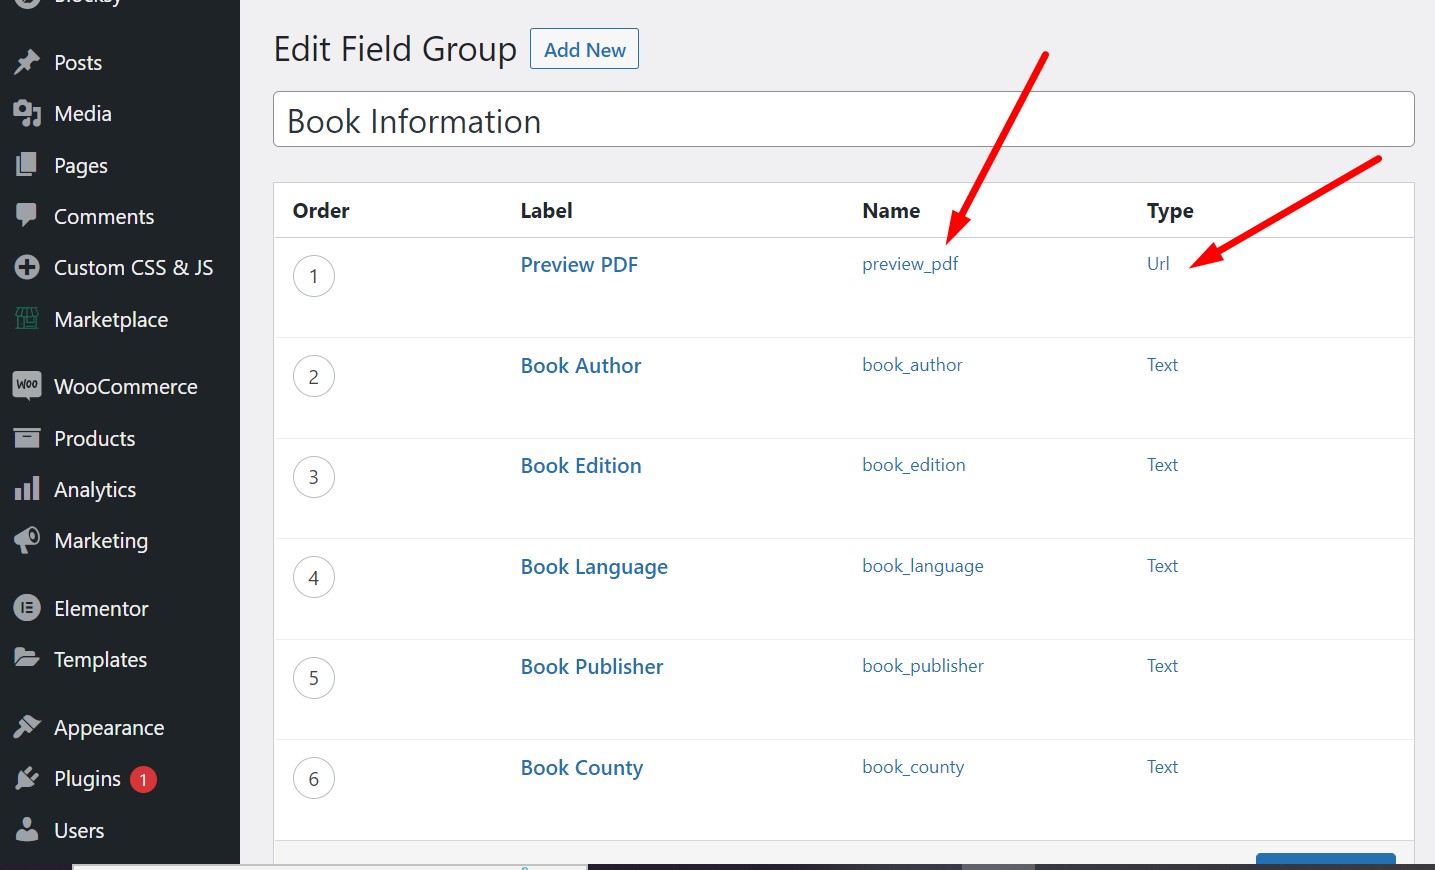
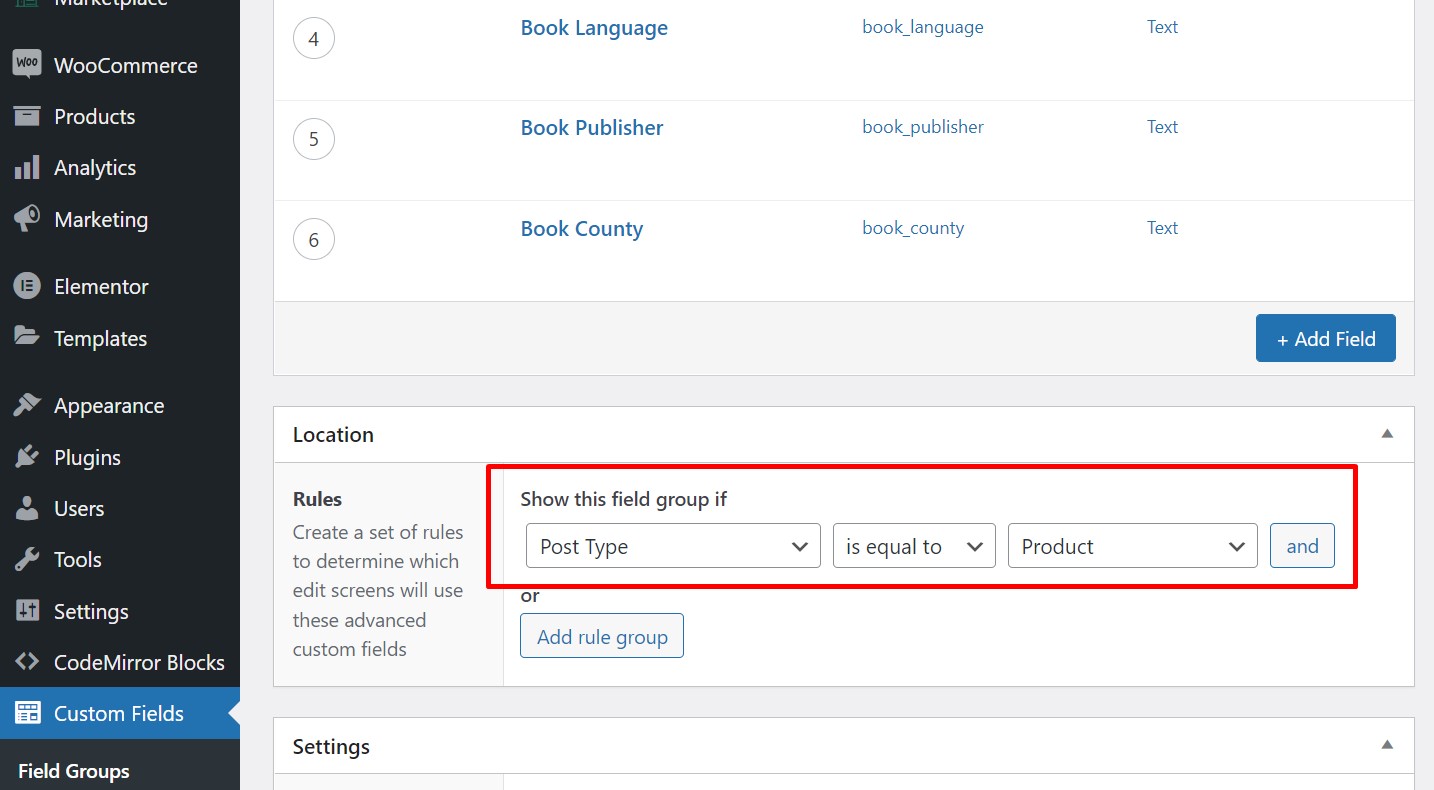
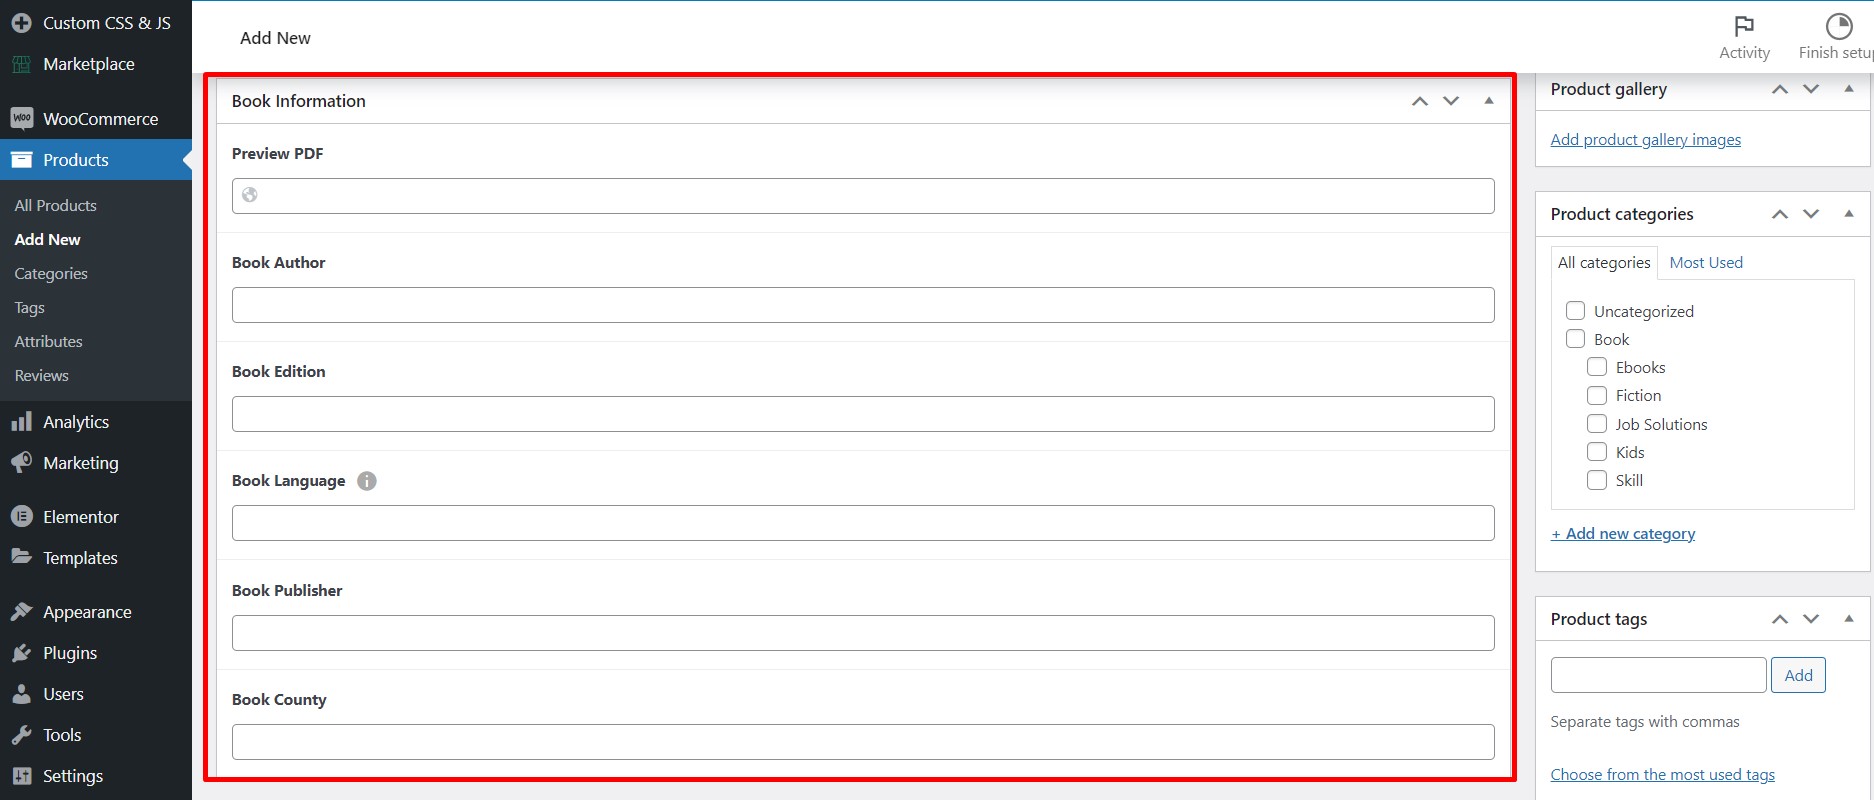
Then select Location Rules Post Type> is equal to> Product and save. After save the field group you can check these fields just go to Products>Add New.
See we have created these fields and those fields showing on our Woocommece “Add New Product Page”
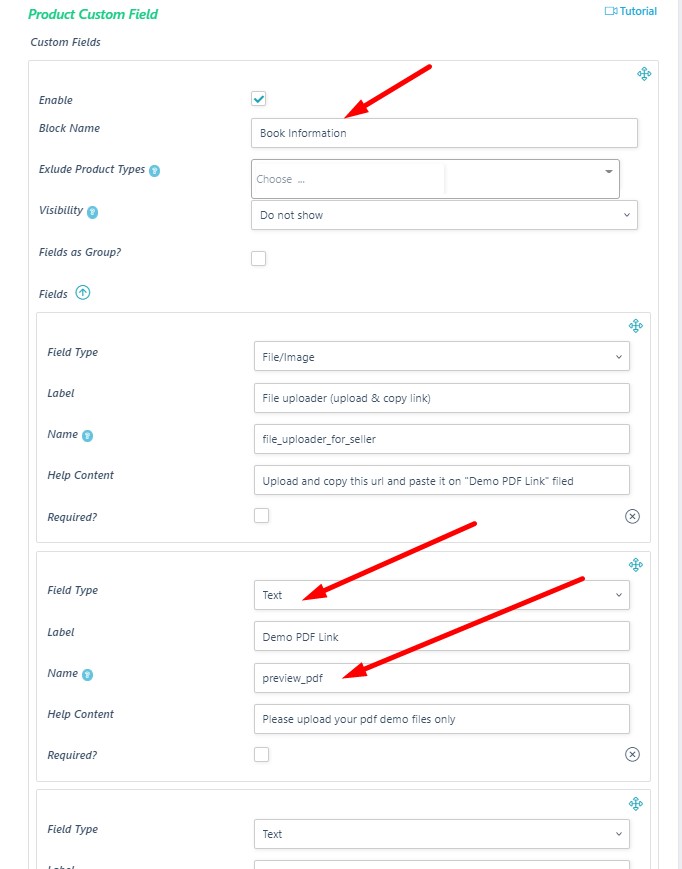
You can show these fields on WCFM – WooCommerce Multivendor Marketplace vendor dashboard. Your vendors or sellers can add product or book information using these fields. Just go to WCFM Dashboard>Settings>Product Custom Field. And type Block Name and add your fields, but you should use the same fields name as used by ACF plugin.
Example: ACF Field name is “preview_pdf” and we have used these filed names on WCFM product custom filed.
☞ How to Show “Read Demo Book” & Book Information on single product page
To showing these ACF fields we need to add some code on our functions.php (child theme) file or using Code Snippets plugin.
//Action hook to showing all ACF fields on Before Add To Card Button.
add_action('woocommerce_before_add_to_cart_form','book_info_single_product');
function book_info_single_product() {?>
<!--To Add Book Information Field "Author, Edition, Language, Publisher"-->
<ul class="book_infolist">
<?php if ( $book_author = get_field( 'book_author' ) ) : ?>
<li><b>Author: </b><?php echo esc_html( $book_author ); ?></li>
<?php endif; ?>
<?php if ( $book_edition = get_field( 'book_edition' ) ) : ?>
<li><b>Edition: </b><?php echo esc_html( $book_edition ); ?></li>
<?php endif; ?>
<?php if ( $book_language = get_field( 'book_language' ) ) : ?>
<li><b>Language: </b><?php echo esc_html( $book_language ); ?></li>
<?php endif; ?>
<?php if ( $book_publisher = get_field( 'book_publisher' ) ) : ?>
<li><b>Publisher: </b><?php echo esc_html( $book_publisher ); ?></li>
<?php endif; ?>
</ul>
<!-- To Add Read Demo Book Feature-->
<?php if ( $preview_pdf = get_field( 'preview_pdf' ) ){ ?>
<button id="myBtn" class="preview_book_btn button">Read Demo Book</button>
<!-- The Modal -->
<div id="myModal" class="modal">
<!-- Modal content -->
<div class="modal-content">
<span class="close">×</span>
<?php echo do_shortcode('[pdf-embedder url="'.get_field('preview_pdf').'"]');?>
</div>
</div>
<?php
}
}
After adding this code we have to add another code to show JavaScript modal box while customers click on the “Read Demo Book” button. You can add custom CSS or JS code using Simple Custom CSS and JS Plugin. Just install this plugin and paste these codes.
// Get the modal Javascript Code
var modal = document.getElementById("myModal");
// Get the button that opens the modal
var btn = document.getElementById("myBtn");
// Get the <span> element that closes the modal
var span = document.getElementsByClassName("close")[0];
// When the user clicks the button, open the modal
btn.onclick = function() {
  modal.style.left = "0";
}
// When the user clicks on <span> (x), close the modal
span.onclick = function() {
  modal.style.left = "-100%";
}
// When the user clicks anywhere outside of the modal, close it
window.onclick = function(event) {
  if (event.target == modal) {
    modal.style.left = "-100%";
  }
}
And you can add this CSS code to design button, list items, and etc.
/* The Modal (background) */
.modal {
   /* Hidden by default */
  position: fixed; /* Stay in place */
  z-index: 999; /* Sit on top */
  padding-top: 100px; /* Location of the box */
  left: -100%;
  top: 0;
  width: 100%; /* Full width */
  height: 100%; /* Full height */
  overflow: scroll; /* Enable scroll if needed */

}
/* Modal Content */
.modal-content {
  background-color: #fefefe;
  margin: auto;
  padding: 20px;
  border: 1px solid #888;
  width: 80%;
}
/* The Close Button */
.close {
  color: #aaaaaa;
  float: right;
  font-size: 14px;
  font-weight: bold;
}
.close:hover,
.close:focus {
  color: #000;
  text-decoration: none;
  cursor: pointer;
}
/* CSS for Read Book Button */
.preview_book_btn {
    width: 100%;
    background: #ffe400;
    color: #000;
}
ul.book_infolist {
    list-style: none;
    padding: 0px;
}
ul.book_infolist li {
    border-bottom: solid 1px #f1f1f1;
    padding: 5px;
}
Hope you enjoyed this article and you have created your professional multi vendor book store website.
You can follow your facebook page, subscribe our youtube channel, and


