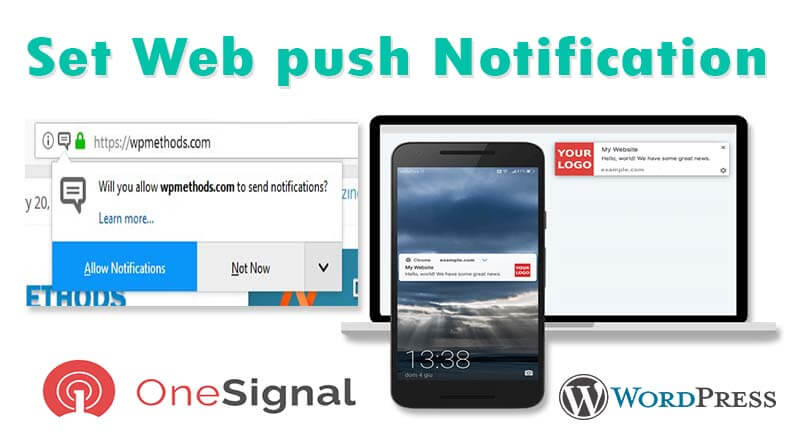
 Do you want to Set Web Push Notification to your WordPress website? When a visitor visit to your WordPress website. then allow push notification system. And sent notifications to visitors even when they are not visiting your website.
Today, I will share with you how to set easily push notification system on your WordPress site. And I will talk to you what is best push notification WordPress plugin for your website. and how to send desktop and mobile push notifications form your WordPress website.
What is Web Push Notification?

Web Push notifications are clickable messages displayed on the top side of visitors desktop or notification area on their mobile device. They can be shown even when the user’s browser is not open.
Aside from desktop push notifications and also work mobile devices. when your visitor allows then convert visitors to customers.
Why set web push notifications on your WordPress?
Web push notifications very important for your website. 80% of visitors who leave your website will never come back. then you need a notifications system for send automatically your post notifications when you post. and visitors come back on your website for reading your post or article etc. and this is the best way to convert your visitor to subscriber or customer.
OneSignal WordPress Plugin
In this article, I will be using the most popular web push notification plugin OneSignal. which is a completely free solution for Setup push notifications on your Wordpress.

According to their website, they are used by over 1,00000 developers and including big names such as Tom’s Hardware, Uber, and Adobe. Some of their features include:
- Unlimited Devices.
- Full API.
- 100% Free to Use.
- Delivery Automation.
- Unlimited Segments.
- Delivery scheduling.
- Unlimited WP push notifications.
- Localization.
- A/B Testing
- Ability to import and export your data
Set web push notification WordPress with OneSignal Plugin.
Follow the Steps below to set push notifications in your website just a matter of minutes. so let’s go to setup push notification in WordPress site easily.
Step-1: Install Onesignal Plugin & Create Onesignal Account.
At first, you need to do the install and active the OneSignal plugin. you can download this plugin form WordPress repository or by searching for it within your WordPress dashboard under “Add New” plugins.

After installation and activated this plugin, then go to the OneSignal Official website and Signup in OneSignal.
Step -2: Creating OneSignal APP.
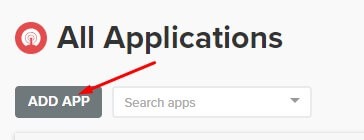
After Signup then you’ll reach the OneSignal dashboard. And you then click on ADD APP button.
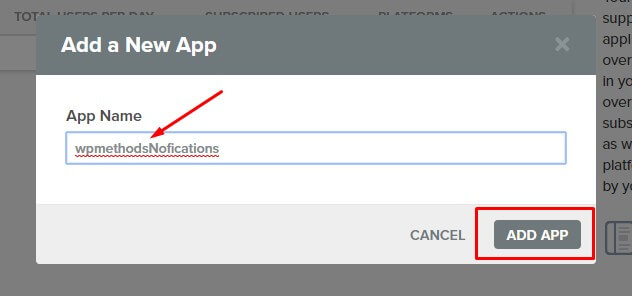
Then type your app name. you can type anything and click on ADD APP.
Then you’ll need to select a platform. You can select multiple platforms for an app. For now, I recommend you selecting ‘Web Push’ and click on the Next button to continue.

Next, you will be asked to select an integration method. Go ahead and click on ‘WordPress Plugin’ or ‘Website Builder’ box and then select WordPress.

Then, scroll down & Enter your site details and include its name and URL. And you set an icon for your website, which you will show on your push notifications. But this step isn’t strictly necessary:

If your site not fully HTTPS you can select this radio button. then click on the Save button and move on to the last step.
Step -2: Configure OneSignal Plugin.
After saving the configuration in the OneSignal dashboard, you will see a new screen showing your APP ID & API KEY.
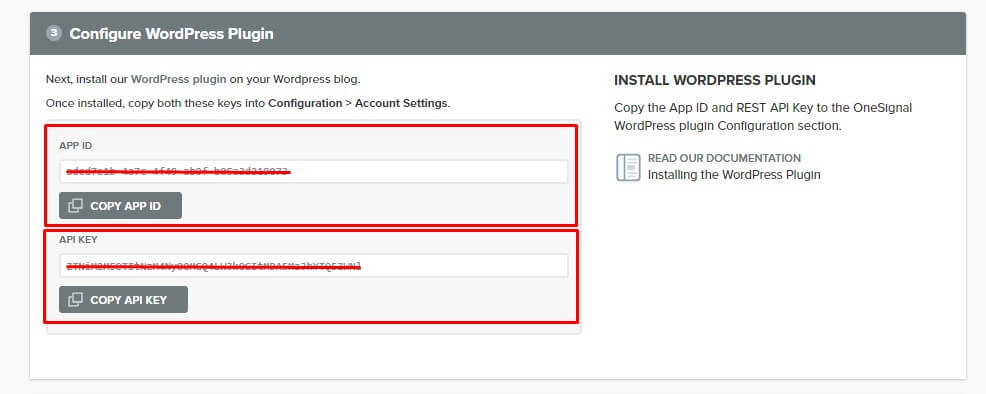
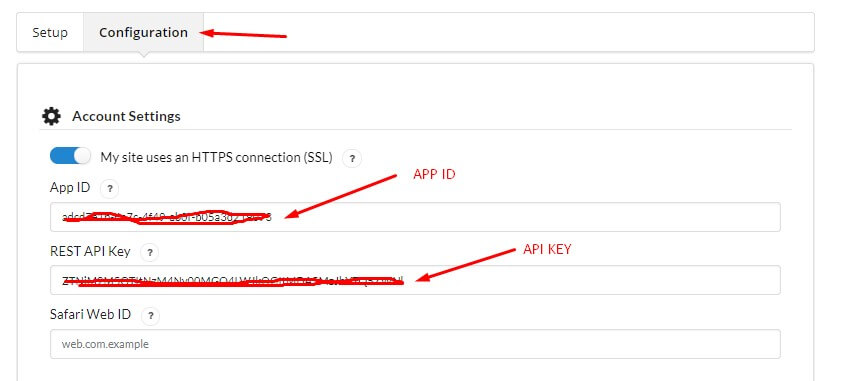
Don’t Close this tab, since you will need both in a minute. Back to your WordPress Dashboard, then go to the OneSignal Push tab, Click on the Configuration tab. Once you are in, you will see three fields, one for your App ID, 2nd for your API Key, and the last one for your Safari Web ID. Fill out the first and 2nd using the data from the previous screen. And you can leave everything else on the default settings for now. Scroll down to the bottom and click on “Save.”
Then you want to browse to your website & subscribe to the notification to test that everything is working. Click on the “Bell” symbol on the bottom right side and click on Allow. You can change these options easily in the display settings later. Note: You might need to disable AdBlocker if you have it running.

Then, you will see a confirmation notification, of which you can also change the wording later.

Step -3: setup the Safari web push notifications.
Go back OneSignal website and Select your App. Click on Settings to the top side in your app dashboard.

Then Click on Apple Safari and follow next step.
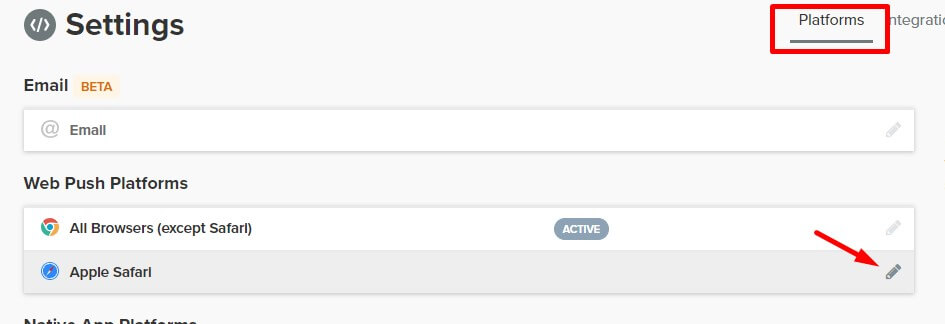
Then, Input your website name and URL. You can upload your notification icons (which include a 16 × 16, 32 x 32, 64 x 64, 128 x 128, 256 x 256). If you do not upload notification icons, then you can use the default OneSignal notification icon. Then click on SAVE button.

After Save, then click again on Apple Safari and Copy your Web ID.

Then, Go back your WordPress Dashboard and go OneSignal Push Settings Configuration Tab. Scroll down and click on Save button.

And that’s it! You now have WP push notifications up and running.
Automatic Push Notifications after publishing any post:
When you install the OneSignal plugin, it by default enables the option to Send notification on post publish automatically (as seen below). You can easily un-check this if you don’t want to get pushed.
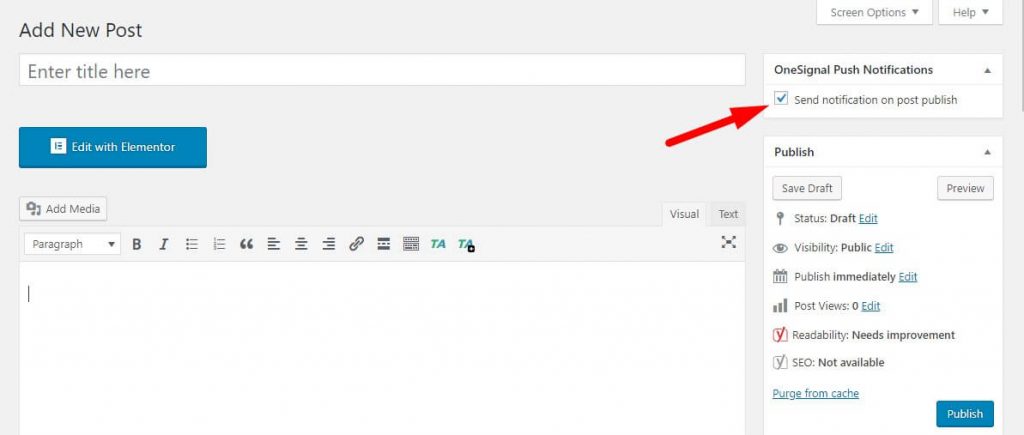
You can also Disable this option, go to OneSignal Push plugin and scroll down. and un-check this option & click on save settings.

Automatically Prompt Users on WordPress Website.
If you want new visitors to be automatically prompted to subscribe to your site, you can enable this option within the OneSignal Plugin settings. And you can also disable this RED floating icon if you think it might be too obtrusive for your website visitors.

So, enjoy OneSignal Plugin! I hope this article helps you to set web push notification on your WordPress website. If you like this article, then you can share this article and visit regularly Our WP Methods website to get more helpful articles.

 My Account


 USD $
USD $  BDT ৳
BDT ৳