 My Account
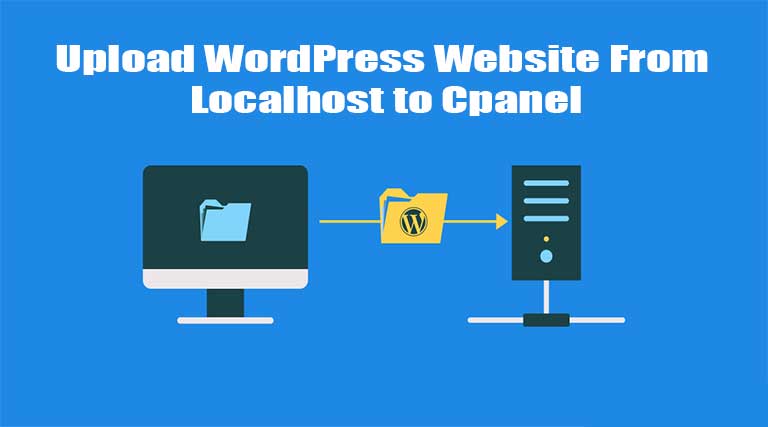
Today I will show you how to upload WordPress website from localhost to Cpanel. When most of the people think about creating a blog using WordPress. They do not consider the possibility of developing it on their own computer and then uploading it to a hosting site. However, it is the most optimal way because it is more convenient and faster to develop on your own PC. In this article, I will explain How to Upload WordPress Website from Localhost to Cpanel.
Ideally, if you want to learn to handle WordPress and not suffer every time you have to make a change to your files. Templates or theme is to keep an installed version of WordPress on your own computer (what we would call development environment).
Also, if this is the first time you are using WordPress, you can prepare all your blog on your computer. And once you have verified that everything works correctly upload WordPress website from localhost to Hosting Server you have contracted (production environment).
Well, then suppose you have already made all the changes you wanted. Modifications to the theme, installation of plugins, configurations, etc. What would be the necessary steps to pass the localhost to Cpanel?
Upload WordPress Website from Localhost to Cpanel.
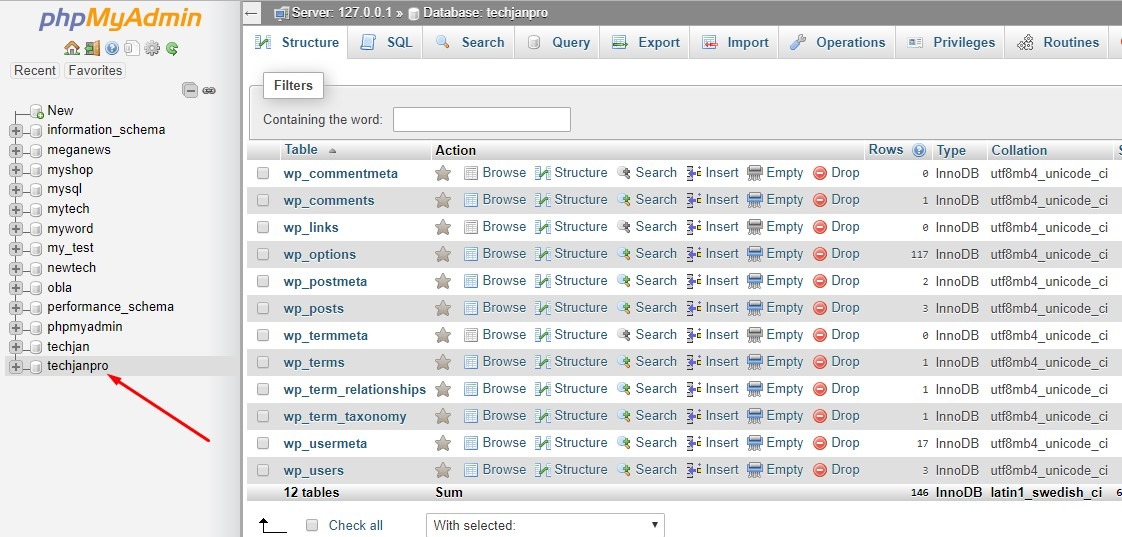
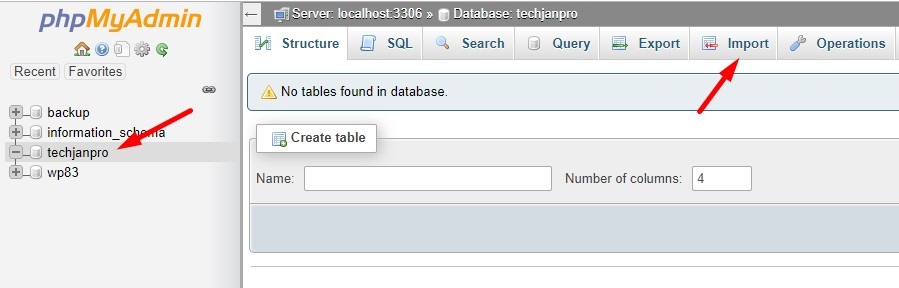
Step 1: Export Database
First of all, the first thing we have to do is export our localhost database to import it later to our Live server. To do this, we simply access http://localhost/phpMyAdmin and select the Database from the left column.
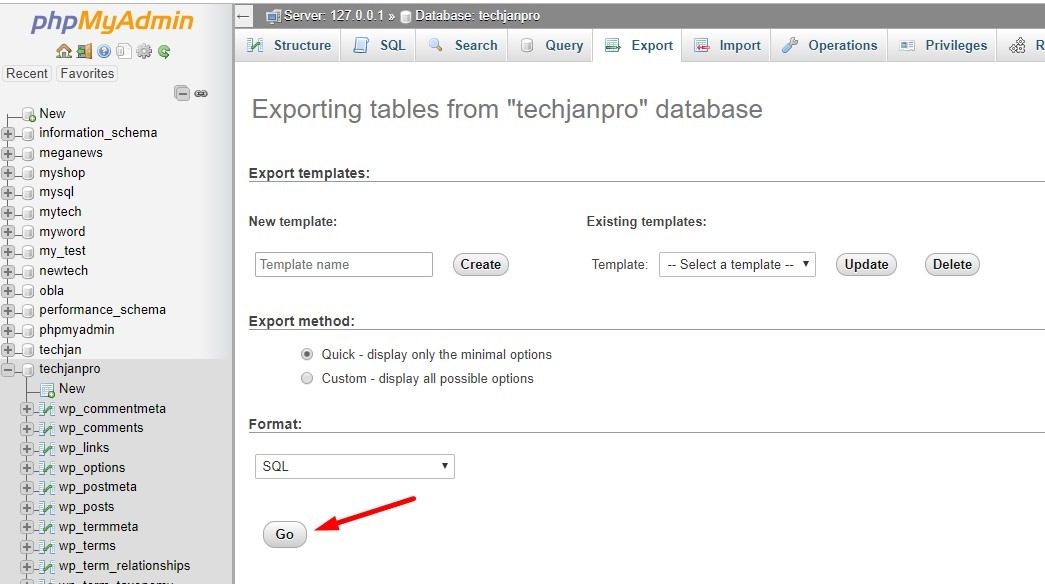
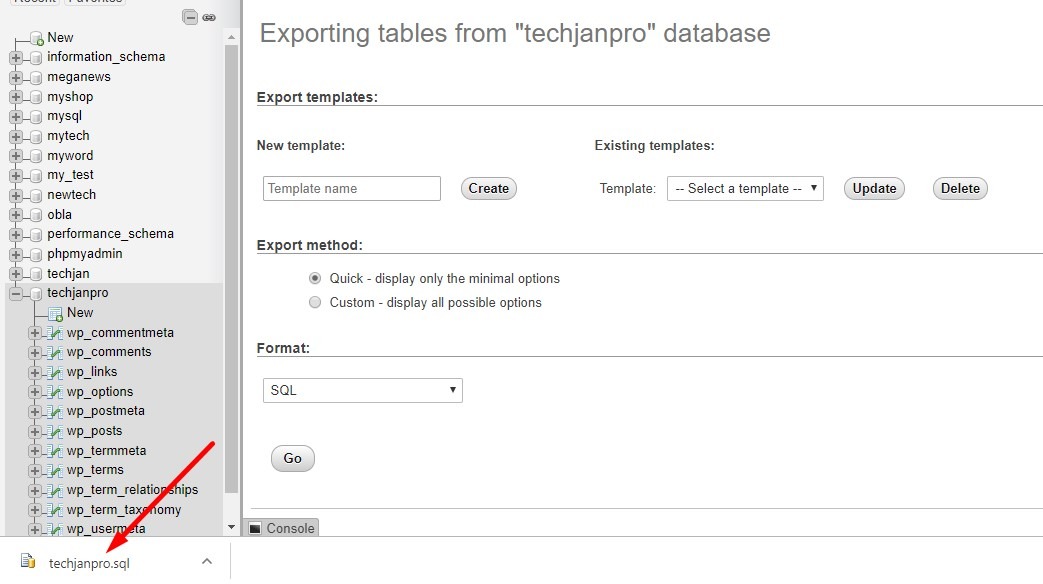
Click on the Export option.

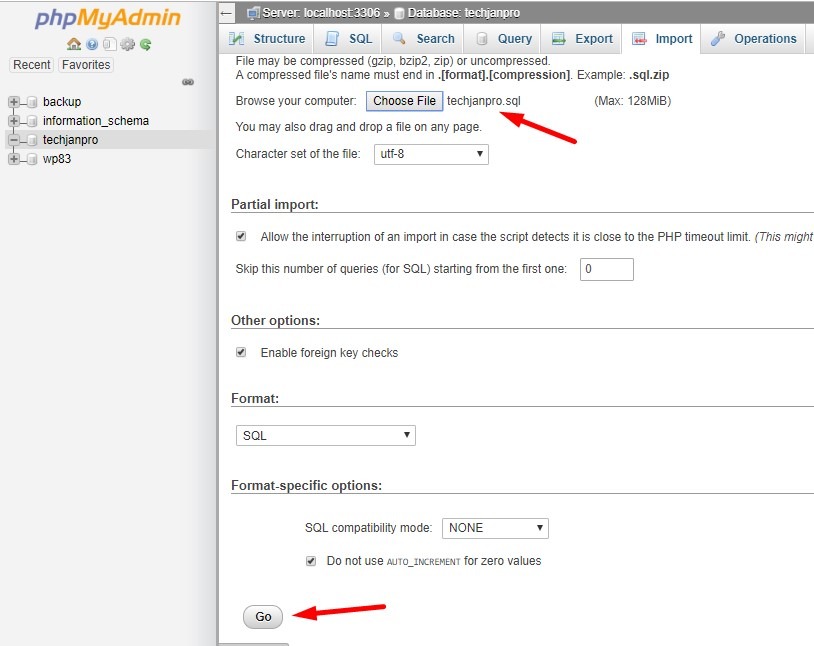
We will access the next window where we will leave the parameters as shown in the following screenshot and click on the GO button. We will save the SQL file for later import into our Cpanel database.
Step 2: Upload all files to the Cpanel
Then we must upload all the files that make up our WordPress development to hosting (we could upload only the folder wp-content that contains the topics for example, but better to avoid possible failures we will upload all files). To do this we simply connect by SFTP (SSH File Transfer Protocol) to our remote server and copy to the public directory of the hosting “public_html” all our WordPress files, for example from c:/xampp/htdocs/techjanpro (localhost) to public_html ( Live Server).
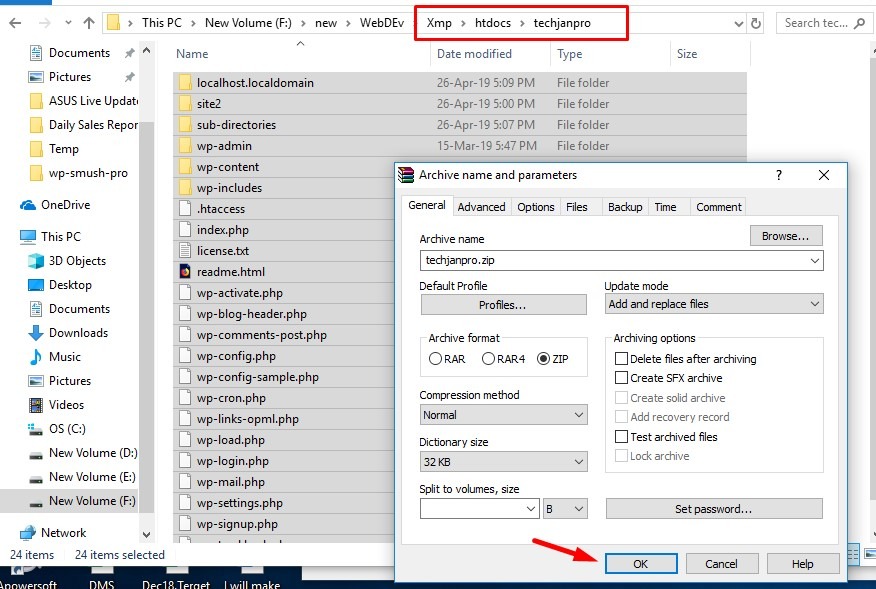
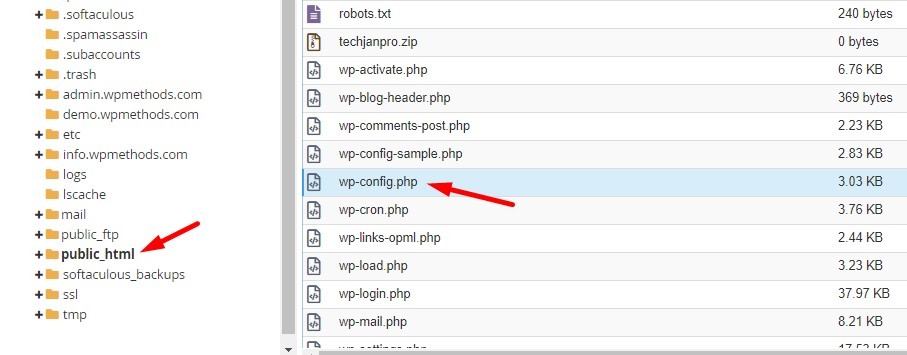
Also, another option is to zip all the files inside c:/xampp/htdocs/techjanpro, upload that .zip file to our Hosting (Live Server) in the public_html directory and unzip the zip (as long as our hosting allows us to unzip records).
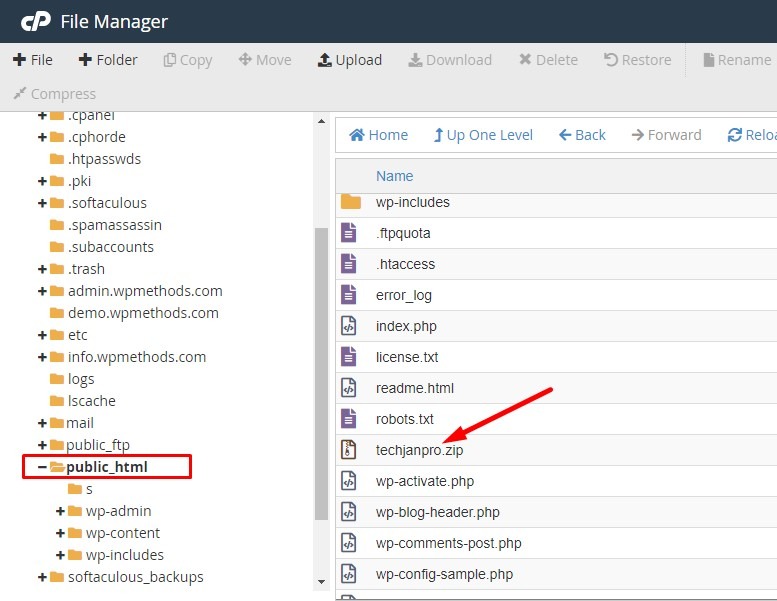
Here you can see a screenshot of my techjanpro.zip file uploaded and unzipped its contents in public_html.
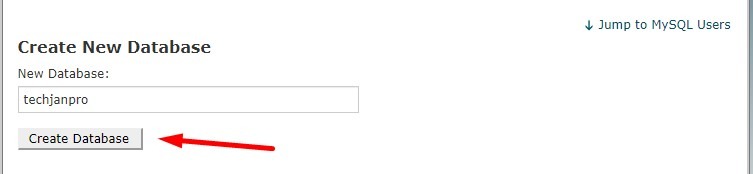
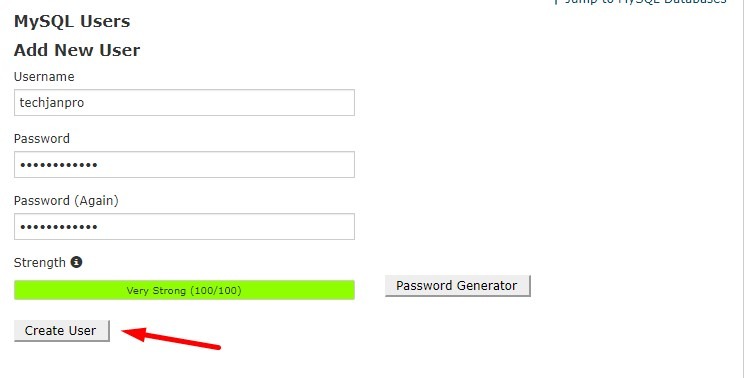
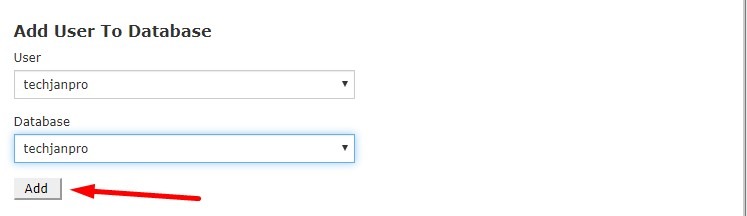
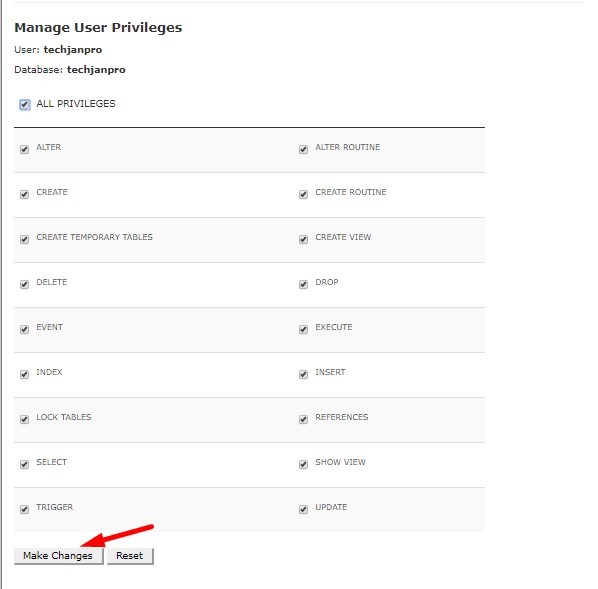
Step 3: Create a New Database and User.
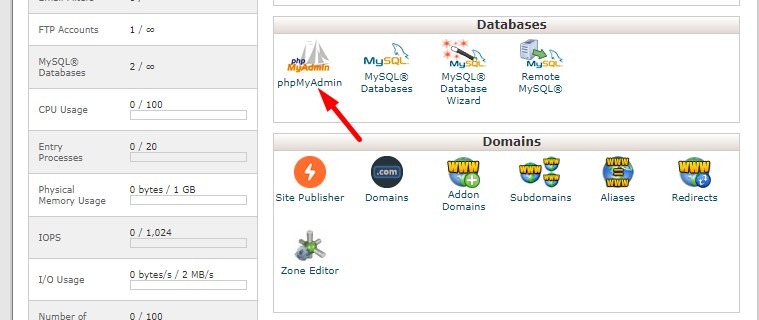
In this step, you must create a new database in your hosting and a user with write permissions and access to that database. Depending on the hosting you have contracted you can create the database directly from the phpMyAdmin. (normally the direct access to phpMyAdmin you will find it in the cPanel of your hosting and it is also usually accessible from http://yourdomain.com/phpmyadmin).
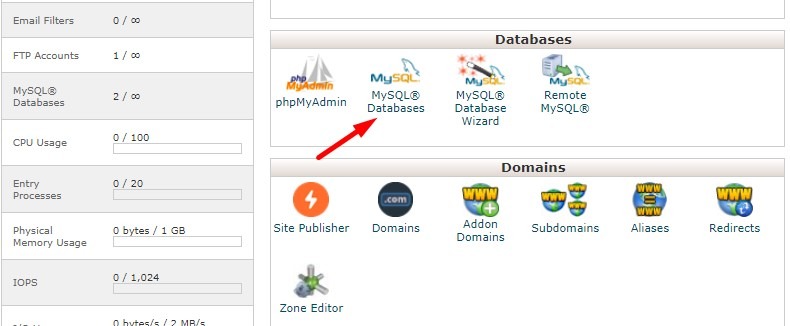
With some hostings, you have to create the database first using another tool that you will find in your cPanel. For example, if you use NameCheap as a service provider you will have to access the option “MySQL Databases“. And from there create the new Database. Later create the user and finally assign that user as administrator of that database.
Step 4: Import the Database to PhpMyAdmin
Now with the database already created (step 3), it is necessary to import the data from our database in local (step 1) to the new empty database in Cpanel. For this, we will access phpMyAdmin from the Live server, select the empty database and click on Import.
Select the file with extension SQL that we have exported in step-1. Leave the rest of the options as they appear in the following capture and click on GO button.
Step 5: Configure wp-config.php with the new data
At this point, we already have on our side our Cpanel database with the same data as in our development environment (localhost) and the files that make up WordPress uploaded to the hosting. Now we need to configure the wp-config.php file with the new data from your remote server (MySQL username, password and database name) since they will be different from your local server.
You can access the wp-config.php file directly from the File Manager of your hosting or from your FTP client.

Edit the file indicating the new data: name of the database, the username of MySQL and password of the user (this data is those of step 3, a moment in which we have created the new database and the user), saves/upload the changes.
Step 6: Fix images and broken links
When we do the migration from localhost to Cpanel. We will have the disadvantage that some of the URLs refer to the development server.
To solve this we must access phpMyAdmin of the production server. Select the database, access the SQL option and execute the following command:
UPDATE wp_posts SET post_content = REPLACE(post_content, ‘localhost/’, ‘www.wpmethods.com/’);
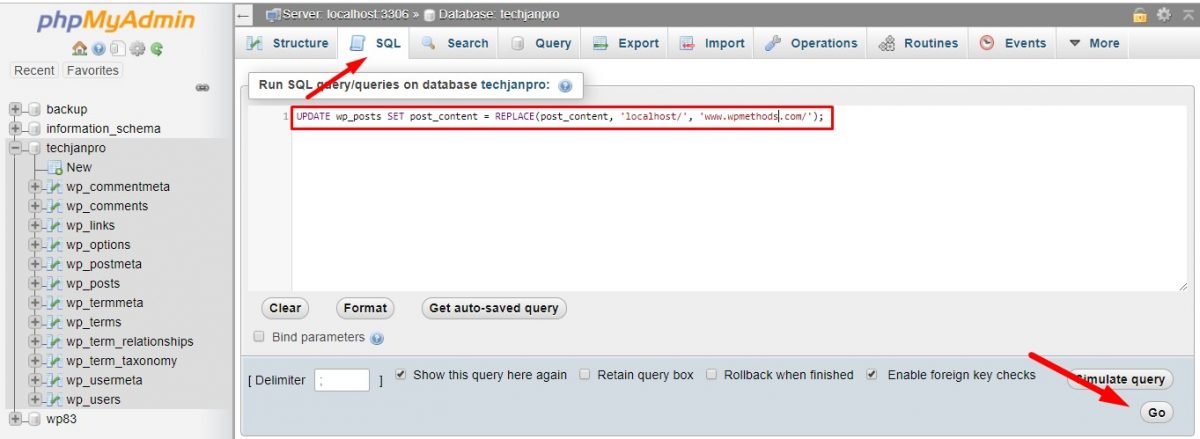
You click on the GO button. After completing these step then visite your website & Enjoy it 😀
.I hope you will successfully complete uploading WordPress Website from Localhost to Cpanel. These same steps would be worth to make a WordPress migration from one hosting to another.


 USD $
USD $  BDT ৳
BDT ৳ 