 My Account
 If you want to Increase WordPress upload limit then you can read this article. As you already know, you can not upload a file of the size you want to the WordPress media library.
There is a limitation. Actually, it is not a limitation of the media library (the limitation also exists, for example, if you want to upload a WXR file using the import tool). It is not even a limitation of WordPress. It is a limitation that is imposed by the PHP configuration of the server.
And, as sometimes this limitation is low and we may need to upload files larger than those allowed by default. We will see how we can increase the maximum file upload size to our website. Because, in reality, this is not only true for WordPress. As I said, it depends on the server, so it does not matter which CMS we are using.
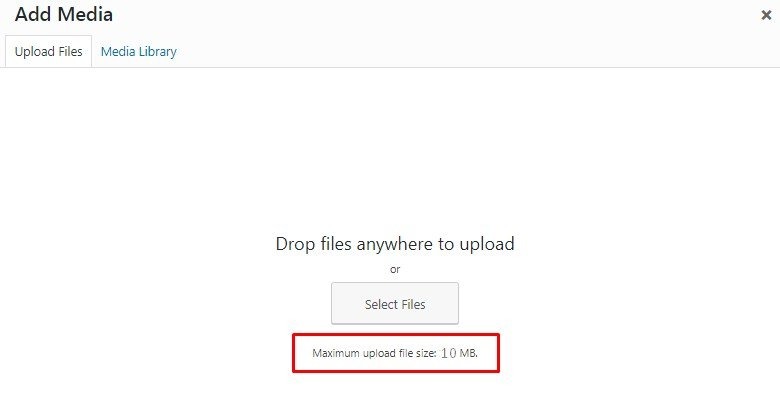
Maximum upload file size
Surely you already know what I’m talking about. From something like this:
Where does the limitation on the maximum file size in uploads come from?
The limitation is not always so pronounced. Sometimes they are two megs, sometimes twenty… It is not very common to see high values, but even up to 128M you can find if you are looking for a bit. Where does that limitation come from then, which has such disparate values?
Well established by the hosting, neither more nor less. Yes, your hosting company is what sets the maximum upload limit via the web. And I stress the web because this limit does not apply to uploads by FTP (which may have its own limits).
How to Increase WordPress Upload Limit
As I was saying, it’s a limit established by your hosting in the PHP configuration. More specifically, this value is configured in the php.ini file. We are already having clues to start looking for a solution. And we are going to do it by testing the various alternatives that we have.
To find the php.ini
The php.ini file is a configuration file for the PHP language, with what is on the server and its directives are applied to all the webs hosted on it. However, sometimes the hosting company establishes individual configurations for each of the independent hosting services, so each one has its own php.ini, with values that apply only to that client.
You’re seeing where I’m going, right? Exact! The first step is to check if you have a php.ini for your hosting server. Look for it in the files of the server, but not in the folder that contains the web: outside the web directories, html or whatever it is called in your case.
Do not bother looking at folders with names like tmp, errors, logs or backup_db: it’s not in them. If you have a directory called conf or etc, there are many chances that you will find it there.
And what should you do when you find it? If the first answer that comes to your mind is not to make a backup of the file, you have more danger than McGyver in a hardware store. First, always, before touching anything, a backup.
Well, with our backup done and our backs well covered, now, we are going to edit the file. Any flat text editor will serve you, if it has search function (CTRL + F in Win, CMD + F in Mac) much better, because we will need it. We are looking for a stretch of text that says the following:
; Maximum allowed size for uploaded files.
; http://php.net/upload-max-filesize
upload_max_filesize=1M
Although, obviously, the final value may change in your case. The important line is the one below (the others may not even be there, everything that starts in that file with “;” are simple comments), and we want to modify it for something more useful: 10M, 20M, 64M … We save, and ready. Upload files!
What if I do not have a php.ini?
Well, the usual thing is that you have not found it. No problem, do not get discouraged so soon, we can still try something else.
Like, for example, create our own php.ini. For that, you can use FileZilla and, using FTP, create an empty file in the root of the hosting and call it (see if you guess) php.ini. Then you edit it and add the line to it:
upload_max_filesize = 256M
post_max_size = 256M
memory_limit = 256M
file_uploads = On
max_execution_time = 300
max_allowed_packet_size = 524288000
Nothing guarantees that the “trick” will work for you, of course. In fact, it is most likely to be useless. If so, we move on to the next attempt.
Increase WordPress Upload Limit or Maximum upload file size using the .htaccess file
Because we still have cartridges to burn, maifrén. One of them is to use the .htaccess file. It is a file of an Apache web server configuration file (the most widespread) that provides specific directives for the site.
Well, let’s try. The first thing you should do is … Exactly, I knew that this time I did not catch you! A backup of the file! Well, done the procedure we edit it. It can also be edited with any plain text editor.
If you use WordPress, the .htaccess file will contain, as a minimum, the instructions needed to convert nice URLs into something understandable by the server itself.
Do not touch anything there if you do not want a swell of 404 errors. You should start adding after where # END WordPress says. And, if there is more text after that, you better go to the end of it all. There you must add:
php_value max_input_vars 5000
php_value max_execution_time 300
php_value post_max_size 128M
php_value upload_max_filesize 128M
php_value memory_limit 256M
And, before you make the change and save, a warning: the server may be configured to not allow such changes through the .htaccess file. If so, your website will return a white screen with the error message Internal Server Error or Error 500 – Internal Server Error, or something very similar.
Do not be scared, just undo the changes, and make the mat. This system does not help either.
Increase WordPress Upload Limit by WP-Config.Php File
If all else fails, there is one more trick you can try. For this, it is necessary to edit the WordPress files directly.
The first step is to access your server by FTP and copy the file “wp-config.php”, located in the root directory, to edit it.
Open the file, and at the bottom add this line:
define(‘WP_MEMORY_LIMIT’, ’64M’);
Then we upload it again to the server.
Your last hope
Anyway, if you’ve arrived here and nothing seen so far has served you, I have for you (as the joke said) a good news and a bad: the good news is that you still have one last cartridge to burn; the bad that does not depend on you.
And it is that this last opportunity is, simply, to contact the support of your hosting by opening a ticket and asking them to increase the maximum size of uploads allowed. Now, whether you get it or not, you see, it will not be in your hand … but the flexibility, efficiency, and kindness of the support service of your hosting company.


 USD $
USD $  BDT ৳
BDT ৳ 